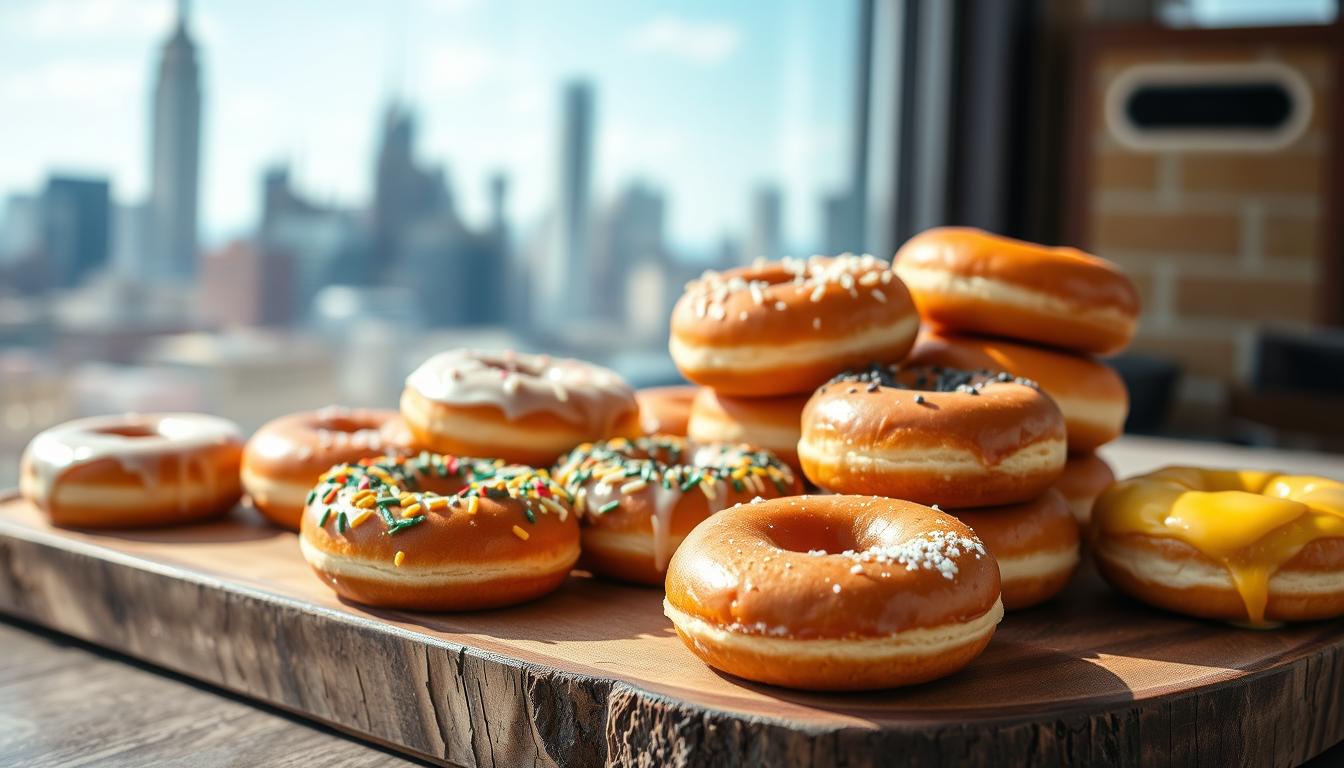
Homemade NY-Style Doughnuts have become a weekend tradition in our Brooklyn kitchen. There’s nothing quite like the smell of fresh dough frying, or that first bite into a warm, pillowy doughnut that tastes just like the ones from our favorite Manhattan bakery.
As a mom who loves recreating New York’s classic flavors at home, I’ve tested and tweaked this recipe to get that perfect yeasted texture soft on the inside, slightly crisp on the outside. These doughnuts are great for busy mornings, rainy-day baking, or anytime we want a sweet taste of NYC right at our table.
In this post, I’m sharing seven Homemade NY-Style Doughnuts recipes that reflect the city’s vibrant neighborhoods from sugar-dusted classics to fun twists inspired by Queens and the Bronx. They’re easy to make, family-approved, and guaranteed to bring that Big Apple charm to your kitchen.
Getting Started: What Makes Homemade NY-Style Doughnuts So Good
Let’s be honest there’s something special about biting into a doughnut that’s still a little warm, fluffy inside, and just the right amount of crispy on the outside. That’s exactly what homemade NY-style doughnuts deliver. They’re not the cake-style ones you might be used to. These are made with yeast, which means they take a bit more time and love but trust me, it’s worth it. Once you get the hang of the rise, the fry, and maybe a fun topping or filling, you’ll be hooked. It’s like bringing a tiny corner of a New York bakery into your own kitchen.
Essential Equipment
- Stand mixer with dough hook (or strong arms for kneading)
- 3-inch doughnut cutter (or two round cutters of different sizes)
- Heavy-bottomed pot for frying
- Candy/deep-fry thermometer
- Cooling racks
- Slotted metal spoon or spider strainer
- Rolling pin
- Baking sheets
- Kitchen towels
- Piping bags (for filled doughnuts)
Start with This Simple Dough
Every great NYC-style doughnut begins with a solid, no-fuss dough and this one’s got you covered. It’s soft, stretchy, and rises beautifully, giving you that signature light and airy bite. Think of it as your doughnut blank canvas. From there, it’s all about what you add on top or inside glazes, sprinkles, fillings that’s where the fun starts and where each doughnut takes on its own NYC flair.
NY-Style Doughnut Base Dough
Ingredients:
- 2¼ teaspoons active dry yeast (1 standard packet)
- ¾ cup warm milk (about 110°F/43°C)
- ¼ cup granulated sugar
- ½ teaspoon salt
- 2 large eggs, room temperature
- ¼ cup unsalted butter, melted and cooled
- 4 cups all-purpose flour, plus more for rolling
- Vegetable oil for frying (about 2 quarts)
Step-by-Step: How I Make These Doughnuts at Home
- Warm the milk not boiling, just warm and mix in the yeast. I usually wait about 5 minutes until it starts to bubble on top.
- Add the sugar, salt, eggs, and melted butter. I crack the eggs in a cup first, then stir everything together gently no need to go crazy with the mixing.
- Slowly add the flour, bit by bit. I don’t dump it all in at once. Once the dough starts coming together and pulling away from the sides of the bowl, I move on to kneading.
- Knead the dough for about 5 minutes, or longer if needed. I just go until it feels smooth and stretchy sometimes I take a break if my arms get tired!
- Grease a clean bowl, drop in the dough, cover it with a towel, and let it rise for about an hour. It should puff up nicely.
- Roll out the dough, then cut it into doughnut shapes. Honestly, I use a regular cup and a bottle cap works fine! Then I let them rest and rise again while I heat up the oil.
- Test the oil heat with a tiny piece of dough. When it sizzles just right, I know it’s ready
- Fry the doughnuts, about 1 minute on each side, until golden brown. I try not to crowd the pan they need room to cook evenly.
- Drain the doughnuts on paper towels, then glaze or fill them however I feel like that day and enjoy while warm!
“The secret to perfect NY-style doughnuts is patience with the yeast. Let it do its magic during both rises for that authentic airy texture.”
1. Brooklyn Blackout Chocolate Doughnut
So, there’s this cake the Brooklyn Blackout Cake maybe you’ve heard of it? My grandma used to swear it was the best thing ever. Dark, rich, and totally over-the-top chocolatey. Anyway, this doughnut? It’s my not-so-fancy tribute to that legend. I fill it with a quick chocolate pudding (nothing complicated, promise), dunk it in a homemade glaze, and sometimes sprinkle a bit of crushed cookie on top, just because. Friends from Queens to the Bronx have tried it no leftovers, ever.

Special Ingredients:
- ½ cup cocoa powder (added to base dough)
- 2 cups chocolate glaze (2 cups powdered sugar, ½ cup cocoa powder, 3-4 tbsp milk, 1 tsp vanilla extract)
- Chocolate pudding filling (2 cups milk, ½ cup sugar, ¼ cup cornstarch, ¼ cup cocoa powder, 1 tsp vanilla extract)
- Chocolate cookie crumbs for topping
How I Make This Doughnut (My Brooklyn Twist):
Alright, here’s how I pull off this chocolatey masterpiece at home not fancy, just real.
- I mix a spoonful of cocoa powder right into the dough makes it extra rich.
- I skip the hole (yeah, no hole here!) because I’m filling these babies with pudding later.
- Once they’re fried and cooled (hardest part is waiting), I pipe in some chilled chocolate pudding using a ziplock bag if I can’t find my piping tip.
- Then I dunk the tops in a homemade chocolate glaze and, if I’m feeling extra, sprinkle crushed cookies on top my kids love that part.
Mom Tip from Brooklyn: Chill the pudding really well before filling. It’s way less messy, and trust me, I’ve learned that the hard way!
2. Matcha Sesame Doughnut
You ever walk past those tiny bakeries in Manhattan that smell like roasted sesame and fresh matcha? That’s where I got the idea for this one.
I’ve been obsessed with the mix of earthy matcha and nutty black sesame ever since I tried it in a small café near the East Village. So I thought — why not turn that into a doughnut?
The result? A lightly sweet treat with a green tea twist and a toasty crunch that feels fancy but is easy enough for a weekday breakfast at home. My husband calls it “the NYC zen doughnut” — no idea why, but it stuck.

Special Ingredients:
- 2 tbsp matcha powder (high-quality)
- Matcha glaze (2 cups powdered sugar, 1 tbsp matcha powder, 3-4 tbsp milk)
- 2 tbsp black sesame seeds, toasted
- 1 tbsp white sesame seeds, toasted (for garnish)
How I Make My Matcha Sesame Doughnuts at Home
Here’s how I bring that East Village bakery vibe into my own kitchen no fancy tools, just simple steps:
- I mix a little matcha powder right into the dough. To get that vibrant green color (and real matcha flavor), I stir it first with a splash of warm water before adding it in.
- Then, I toss in about a tablespoon of black sesame seeds they give the dough a lovely nutty crunch.
- After frying the doughnuts (they puff up beautifully), I dip them in a warm matcha glaze. The trick? Do it while they’re still warm so the glaze sticks just right.
- Before the glaze sets, I sprinkle on a mix of black and white sesame seeds for that NYC bakery-style finish.
Mom Tip: Use culinary-grade matcha it makes all the difference in flavor and color. I learned that the hard way after my first batch turned out a weird shade of green!
“The matcha-black sesame combination is a perfect example of how NYC’s diverse food culture inspires creative flavor pairings.”
3. Maple Pecan “Upstate” Doughnut — A Bite of Cozy New York
There’s something about cool autumn mornings in upstate New York that stays with you the crunch of leaves, the smell of wood smoke, and that first drizzle of warm, real maple syrup on something homemade.
That memory is what inspired this doughnut. It’s my little nod to the maple farms and roadside stands we visited as kids. I take soft, fluffy doughnuts and top them with a buttery maple glaze and toasted pecans simple, but somehow it always feels like a treat.
Sometimes I make these for weekend brunch, and honestly, they vanish fast especially when served warm with a little extra syrup on the side.

Special Ingredients:
- ¼ cup pure maple syrup (added to base dough)
- Maple glaze (2 cups powdered sugar, ¼ cup maple syrup, 2 tbsp milk)
- 1 cup pecans, toasted and chopped
- ½ tsp cinnamon (added to base dough)
Real Talk: My Maple Pecan Doughnut Routine (No Fancy Stuff)
Let me be honest I didn’t grow up making doughnuts. But on a random cold morning in Brooklyn, I thought, “Why not try something with that maple syrup I got from my cousin in the Catskills?”
- I started by swapping out some of the sugar just a bit and pouring in maple syrup instead. Not the store kind. The real, sticky, dark stuff. It made the dough smell amazing, even before cooking.
- I also grabbed some cinnamon (because why not?) and added a little to the dough mix. My kitchen already felt like fall.
- After frying (yep, I always test one doughnut first), I dunked them right into a maple glaze I whipped up messy but worth it.
- And here’s the fun part: I crushed up some pecans and tossed them on top while the glaze was still gooey. The crunch? Total perfection.
Mom Hack (or Dad, or whoever’s cooking): Use that strong, dark Grade B maple syrup not the light stuff. It cuts through the sweetness and actually tastes like maple.
4. Dulce de Leche Churro Doughnut — A Bite of NYC’s Latin Flavor
Let me tell you, this one brings me straight back to those little street carts in Queens where churros are always fresh and the air smells like cinnamon. I wanted to capture that joy but in doughnut form.
I remember the first time I tried to fill a doughnut with dulce de leche not gonna lie, it was messy! But once I got it right? Game changer.
Here’s the vibe: It’s a classic doughnut, but once fried, I roll it in cinnamon sugar while it’s still warm (just like a churro!). Then, I pipe in that rich, creamy dulce de leche the kind you eat with a spoon when no one’s looking.
My kids? They ask for these on Sundays. My neighbor from the Bronx? She says it’s better than the ones at her local bakery (I’ll take the compliment!).
NYC Love Note: This doughnut is my small way of celebrating the incredible Latin American flavors you find all over the city from Brooklyn bodegas to Harlem bakeries. It’s more than dessert it’s a tribute.

Special Ingredients:
- Cinnamon sugar coating (1 cup sugar, 2 tbsp cinnamon)
- Dulce de leche filling (1 can dulce de leche or homemade)
- 1 tsp vanilla extract (added to base dough)
- Zest of 1 orange (added to base dough)
How I Make My Dulce de Leche Churro Doughnuts (My Way!)
- Flavor boost first: I always stir a splash of vanilla extract and a bit of fresh orange zest right into the dough. It gives the doughnuts a subtle warmth — like something you’d find at a tiny Brooklyn bakery run by someone’s abuela.
- No holes here: I don’t cut out the centers — these beauties are meant to be filled! After frying, they’re golden pillows just waiting for that dulce de leche.
- Roll ‘em hot: As soon as the doughnuts come out of the oil, I roll them straight into a bowl of cinnamon sugar. Trust me — doing this while they’re hot helps the sugar stick perfectly.
- The sweet finish: Once they’ve cooled a bit (I give it 10 minutes), I pipe in the dulce de leche. I use a small piping tip and try not to overfill — although honestly, a little mess never hurt.
My Tip: If you’ve got it, add a pinch of ground star anise to the cinnamon sugar. It’s a tiny step, but it adds a depth that reminds me of traditional churros I’ve tasted in the Bronx during summer street fairs.
“These doughnuts remind me of Sunday mornings in Washington Heights, where the scent of cinnamon and sugar fills the air.”
5. Halva Tahini Doughnut My NYC Bakery Favorite
There’s this little bakery I found on the Lower East Side nothing fancy, but their halva-tahini pastries blew me away. I’d never thought sesame could taste so rich.
That’s what inspired this doughnut. It’s simple: soft dough, a hint of tahini inside, and sweet halva crumbled on top. The mix of nutty and sweet reminds me of weekend strolls through NYC neighborhoods where old-school Jewish bakeries meet Middle Eastern shops.
Not your usual doughnut but one I now make all the time at home.

Special Ingredients:
- 2 tbsp tahini paste (added to base dough)
- Tahini glaze (2 cups powdered sugar, 3 tbsp tahini, 3-4 tbsp milk)
- ½ cup crumbled halva for topping
- 1 tbsp sesame seeds (optional garnish)
How I Do It (Halva Tahini Doughnuts – My Way):
- When I’m mixing the dough, I swirl in a spoonful of tahini paste just enough to get that nutty flavor without overpowering it.
- After frying, I dunk the doughnuts in a warm tahini glaze I make with a bit of honey and lemon juice — nothing fancy, but it brings everything together.
- While the glaze is still sticky, I crumble some halva on top — messy but worth it. Sometimes I toss on a few sesame seeds too, just for looks.
Little Tip from My Kitchen: If you’ve got a Middle Eastern market nearby, that’s where I find the really good halva. It makes all the difference trust me.
6. Lemon Ricotta Doughnut
Ok, so this one takes me straight back to a tiny bakery in the Bronx my aunt used to love it was tucked between a butcher and a flower shop, and every spring, they had these soft lemon pastries with ricotta inside. I remember biting into one and thinking, “Why don’t we make this at home?”
Now, I do. I mix a spoonful of ricotta right into the dough not too fancy, just enough to make it light and a little creamy. After frying, I pour over a simple glaze with fresh lemon juice and zest. My kids call these “sunshine doughnuts” we make them on lazy weekends when the weather’s warming up.

Special Ingredients:
- ½ cup ricotta cheese (added to base dough)
- Zest of 2 lemons (1 for dough, 1 for glaze)
- Lemon glaze (2 cups powdered sugar, 3 tbsp fresh lemon juice, 1 tbsp milk, lemon zest)
- 1 tsp vanilla extract (added to base dough)
How I Make These Lemon Ricotta Doughnuts at Home:
- I start by stirring a spoonful of ricotta into my usual dough mix — but before that, I always let the ricotta drain a bit (just in a mesh strainer over a bowl) for maybe half an hour, otherwise it makes the dough too wet.
- I also throw in some fresh lemon zest and a tiny splash of vanilla — not measuring too strictly — just enough to smell nice.
- Since the ricotta makes things softer, I use a little less flour than usual. I usually go by feel, but it’s about a quarter cup less, give or take.
- Once they’re fried and still warm, I dip each doughnut into a simple lemon glaze (powdered sugar + lemon juice — no need to overthink it).
- Right after glazing, I grate a little extra zest on top — it looks pretty and gives that fresh lemony kick.
Little tip from experience: Don’t skip draining the ricotta — I did once, and the dough turned into a sticky mess. Live and learn.
7. Apple Cider Doughnut Holes
Every fall, we make a trip just outside NYC to pick apples and honestly, these little doughnut holes remind me of those crisp mornings at the orchard. Even though they’re a “fall thing,” I end up making them all year because the kids keep asking.
They’re small, quick to fry, and packed with cozy flavors. I mix real apple cider into the dough (not juice big difference!), toss in a bit of cinnamon and nutmeg, and after frying, I roll them in cinnamon sugar while they’re still warm. That smell Pure autumn in New York, right in the kitchen.

Special Ingredients:
- ½ cup apple cider, reduced to ¼ cup (added to base dough)
- 1 tsp cinnamon (added to base dough)
- ¼ tsp nutmeg (added to base dough)
- Cinnamon sugar coating (1 cup sugar, 2 tbsp cinnamon, 1 tsp ground ginger)
Special Steps (How I Make Them at Home):
- First, I simmer the apple cider on the stove until it’s reduced by half — this concentrates the flavor and makes the dough extra tasty.
- I add that reduced cider, plus a little cinnamon and nutmeg, straight into my dough mixture.
- Instead of cutting traditional doughnut shapes, I roll the dough into small 1-inch balls (super quick and no fancy cutter needed).
- Once they’re fried and golden, I toss them in cinnamon sugar right away — while they’re still hot so it sticks better.
Mom Tip: I pop them in a brown paper bag with the cinnamon sugar and give it a good shake — just like the street vendors do near Union Square in the fall. The kids love that part!
“These remind me of trips to the Union Square Greenmarket in fall, when the apple cider vendors set up shop.”
Real-Life Tips for NYC-Style Doughnuts (from My Tiny Kitchen to Yours)

Dough Tips
- Warm milk, not hot! If it feels like a warm bath (about 110°F), the yeast will be happy. Too hot Yeast freaks out and dies.
- Let it rise in peace. Twice. I know it’s tempting to rush, but doughnuts need time to puff up right don’t skip either rise.
- Go easy on the dough.The more you poke and squish it, the tougher it gets. Gentle hands, folks.
- Overnight magic. If mornings are chaotic (they are here), pop your dough in the fridge overnight. It’ll taste better and you’ll feel like a pro.
Frying Tips
- Oil temp sweet spot? 375°F. Not too hot, not too cool. I test with a tiny dough piece if it sizzles, we’re good.
- Fry in small batches. 2 or 3 doughnuts at a time max. Crowding the pan = sad, soggy doughnuts.
- Drain well! Paper towels are your best friend. A quick blot makes a big difference.
- Timing trick: Glaze while still warm for that melt-in moment. Fill when cool, unless you want a gooey mess (been there…).
My NYC-Weekday Hack (Seriously Useful!): Make the dough the night before and On school nights, I make the dough before bed and let it chill in the fridge overnight. In the morning, I bring it to room temp for half an hour, shape it, let it puff up again, and fry while the kids get dressed. Fresh doughnuts before 8 AM feels like winning.
For more expert baking tips, check out the Bake From Scratch, where professional pastry chefs share their secrets for perfect doughnuts.
Healthier Takes on Classic NY-Style Doughnuts (Tried These at Home)
Alright, I get it traditional doughnuts are pure comfort food, but sometimes you want that NYC doughnut joy without feeling like you need a nap afterward. Here are some little tweaks I’ve tried in my own kitchen to make these treats a bit lighter, without losing the fun.

Baked, Not Fried
Yep, you can totally bake them I use the same dough but pop them in the oven at 375°F for about 10–12 minutes. Once they’re golden, I brush on a little melted butter (it’s the secret to keeping that soft bite). The kids barely notice the difference and I feel a bit better serving them on a school morning.
Whole Grain Options
I’ve experimented by swapping out half the regular flour for whole wheat pastry flour. It adds a nice, subtle nutty flavor and a bit more fiber without turning the doughnuts into hockey pucks. Win-win.
Sweeteners with Benefits
Instead of white sugar, I sometimes go for honey or maple syrup (or coconut sugar when I have it). They give a deeper flavor, plus you sneak in some extra minerals. Maple in the glaze is my favorite especially for fall mornings in Brooklyn.
Looking for more healthy NYC-inspired breakfast ideas Check out our NYC-Inspired Family Breakfasts that are both nutritious and delicious.
Frequently Asked Questions
What makes a doughnut “New York-style”?
Hmm, for me, it’s that soft, airy inside like the doughnuts you get at the corner bakery in New York. They’re not heavy like cake doughnuts, you know? These have that pillowy bite, thanks to the yeast dough. Also, they’re usually bigger and not super sweet on their own most of the flavor comes from the glaze or filling. Oh, and when they’re fresh, the outside is a bit crisp. That’s what reminds me of NYC.
How do I keep homemade doughnuts fresh?
In my house, these rarely last more than a few hours! But if you happen to have leftovers (lucky!), here’s what I do: once they’ve cooled down completely, I store them in a container with a tight lid, right on the counter. They’re best within a day or two. I don’t put them in the fridge they get stale too fast. Want to save them longer? I’ve had success freezing them before glazing, then warming them slightly and finishing them when I need a treat.
Can I make doughnuts without a stand mixer?
Oh yes I’ve done it plenty of times. When I don’t feel like hauling out the stand mixer, I just use a big bowl and a wooden spoon to bring the dough together. Once it’s sort of shaggy and sticky, I move it to the counter and knead by hand. It takes maybe 8–10 minutes and a little extra flour, but honestly, it’s kind of relaxing. The dough might feel sticky at first, but the more you knead, the smoother and more elastic it gets. So yes totally doable without fancy tools.
What’s the best oil to fry with?
I’ve tried a few, but I always come back to canola or vegetable oil they’re light in flavor and work really well. You could use peanut oil too if no one has allergies. Just avoid oils like olive or coconut they change the flavor too much. Whatever oil you choose, I aim to keep it at 375°F the whole time. A thermometer really helps I’ve ruined a batch or two by guessing!
Can I make them vegan?
Yes! I’ve done it for friends. I switch to oat milk or almond milk, use a vegan butter substitute, and instead of eggs, I mix applesauce with a little cornstarch (¼ cup applesauce + 1 tablespoon cornstarch per egg). It changes the texture a little, but they’re still delicious. For glazes, just use your plant milk, and check that your powdered sugar is vegan not all brands are.
Bring That NYC Bakery Vibe Into Your Kitchen
Hey, it’s Samantha here Brooklyn mom, food lover, and someone who’s been known to stand in line way too long for a good doughnut. Let’s be real there’s just something about a fresh, warm, NY-style doughnut that hits different. So, I figured… why not try making them at home? Turns out, it’s totally doable and honestly, kind of fun.
I’ve pulled together 7 doughnut recipes that are straight-up inspired by the city itself think gooey chocolate vibes from Brooklyn cafés, or bold flavors you’d find walking through Queens or the Bronx. These aren’t fancy, chef-level things just good, honest recipes that your kitchen (and your crew) will love.
And once you nail the basic dough? Oh man, the possibilities open up. You can totally freestyle it toss in your own twist, mess around with flavors, see what sticks. Honestly, it’s kind of like taking a tiny NYC food tour… but, like, in your kitchen. Bonus: you don’t even have to put on real clothes.
 For more urban kitchen inspiration and time-saving techniques, visit our guide to Easy Urban Kitchen Hacks that make cooking in small NYC apartments more manageable.
Want to learn more about the science behind perfect doughnuts? King Arthur Baking offers practical guides and clear explanations about dough chemistry and frying techniques, helping you master every batch at home.
Never Miss a Recipe!
Join our community of NYC food enthusiasts and get our latest recipes, cooking tips, and exclusive content delivered straight to your inbox.Or follow us on [Instagram]